
Making Handmade Stickers With A Cricut - DIY Craft Tutorial
Everything you need to know to make handcrafted stickers in your home. Easy step-by-step tutorial begins now!

Have you been getting a spark of creativity and want to start making stickers right from your home?
You are in the right place! Grab a cup of coffee to enjoy this blog post filled with tips, tricks, and helpful links.
First, a little bit about how I started making stickers:
I was feeling crafty and came across videos and tutorials on sticker making. I wanted to challenge myself to make my own because stickers are so fun! I sat down all day long, just like you might be, to research and gather materials.
I design my stickers DIGITALLY, which means I hand-draw all of my stickers using my iPad Pro and Apple Pencil. To cut the stickers, I use a machine called a Cricut Maker 3 machine. It creates precise and quick cuts around your sticker. I'll explain more of this below. Keep reading!
My process has worked well for me. I found fun and success in sticker making, so I decided to take the plunge and launch my sticker shop! In this post, I'm giving you all the details to making your OWN STICKERS.
Enough about my sticker journey — let’s get learning!

YOU WILL NEED:
- Sticker design (I digitally design on an iPad app called Procreate. If you don't have an iPad or this app, download my free sticker design at the end of this tutorial.)
- Cricut machine (I use a Cricut Maker 3)
- Cricut Design Space
- Cricut cutting mat (or a cheaper Amazon dupe that works the same!)
- Sticker Paper (I use Online Labels paper)
- Inkjet Printer (This is my Canon Pixma printer, but any inkjet printer works. Canon Pixma and Epson EcoPrint collections would be my go-to printers. Quick note, I've also heard many great things about Canon Pixma Pro-200 printers and have been looking into them!)
DESIGNING THE STICKER
I design my stickers on my iPad using an app called Procreate. I highly recommend it, but if you don't have it, no worries - I have a freebie sticker design you can download at the end of this post and use to try making a sticker.
When I'm conceptualizing the sticker design, I first consider if I want it to be more of a text design (i.e., a quote) or a graphic design (i.e., a flower). It takes many drafts, adding/deleting layers, asking my sisters what they think, etc. before it gets finalized.
Once you're happy with your design (or if you're using my sticker design file, once you've downloaded it), let's get to the next step.
SETTING UP YOUR STICKER
I export the sticker design as a PNG file to my computer. You can AirDrop or email the file to your computer. Pro tip: If you have iOS devices, AirDrop is the easiest way.
Now that it is on your computer, we will be using Cricut Design Space, a digital app on your desktop or iPad that works with all Cricut smart cutting machines to help design, setup, and layout your Cricut projects. Open Cricut Design Space and select "NEW." You should see a blank canvas with grid lines, like so:

UPLOAD STICKER TO CRICUT DESIGN SPACE
- Select "Upload". Drag and drop your sticker design file.
- Select "complex design"
- Design should be transparent background. If it is, then select "apply and continue"
- Select "Print then Cut"


Now, the file is uploaded. You can select it and click "Add to Canvas." The file may show up very large at first. No worries, just resize it. Stickers tend to be 2-4 inches, and that's all up to you.
FORMAT STICKER ON CANVAS
Format your sticker to fit the print-and-cut method. Pro tip: The print and cut feature has a maximum printing size of 6.75x9.25". This means your project can't exceed these measurements.
To make the most of your sticker paper, you can create a solid rectangle background to use as a reference guide as you set up your stickers. This contrasting shape will help you know how many stickers can fit in the printing area:
- Select "Shapes" on the left side tool bar.
- Select the square.
- Change the dimension of the square to 6.75" (H) and 9.25" (W)


When you finished formatting your stickers, turn off the dark square shape. Select all your stickers and click "attach." Then, you're ready to print and cut the stickers!
PRINTING THE STICKERS
It’s important to note that a Cricut machine does NOT have any printing function. That’s why you’ll need a separate inkjet printer.
In your printer, put your sticker paper in the feeder tray.
Then, on Cricut Design Space, you will click "Make It."
It will prompt you to select your printer (i.e., mine says "Canon TS6300 series"). You will want to turn the "add bleed" toggle OFF and turn the "use system dialog" toggle ON.
Then, click next.
(The reason why you want to manage your print settings on your computer's system dialog is because you can select more complex and detailed printing settings.)

This is where directions may vary; it depends on each computer and printer. My printer system dialog settings pops up in a new window (it might be behind the Cricut Design Space window. It hides, sometimes!). I select my settings and click PRINT.

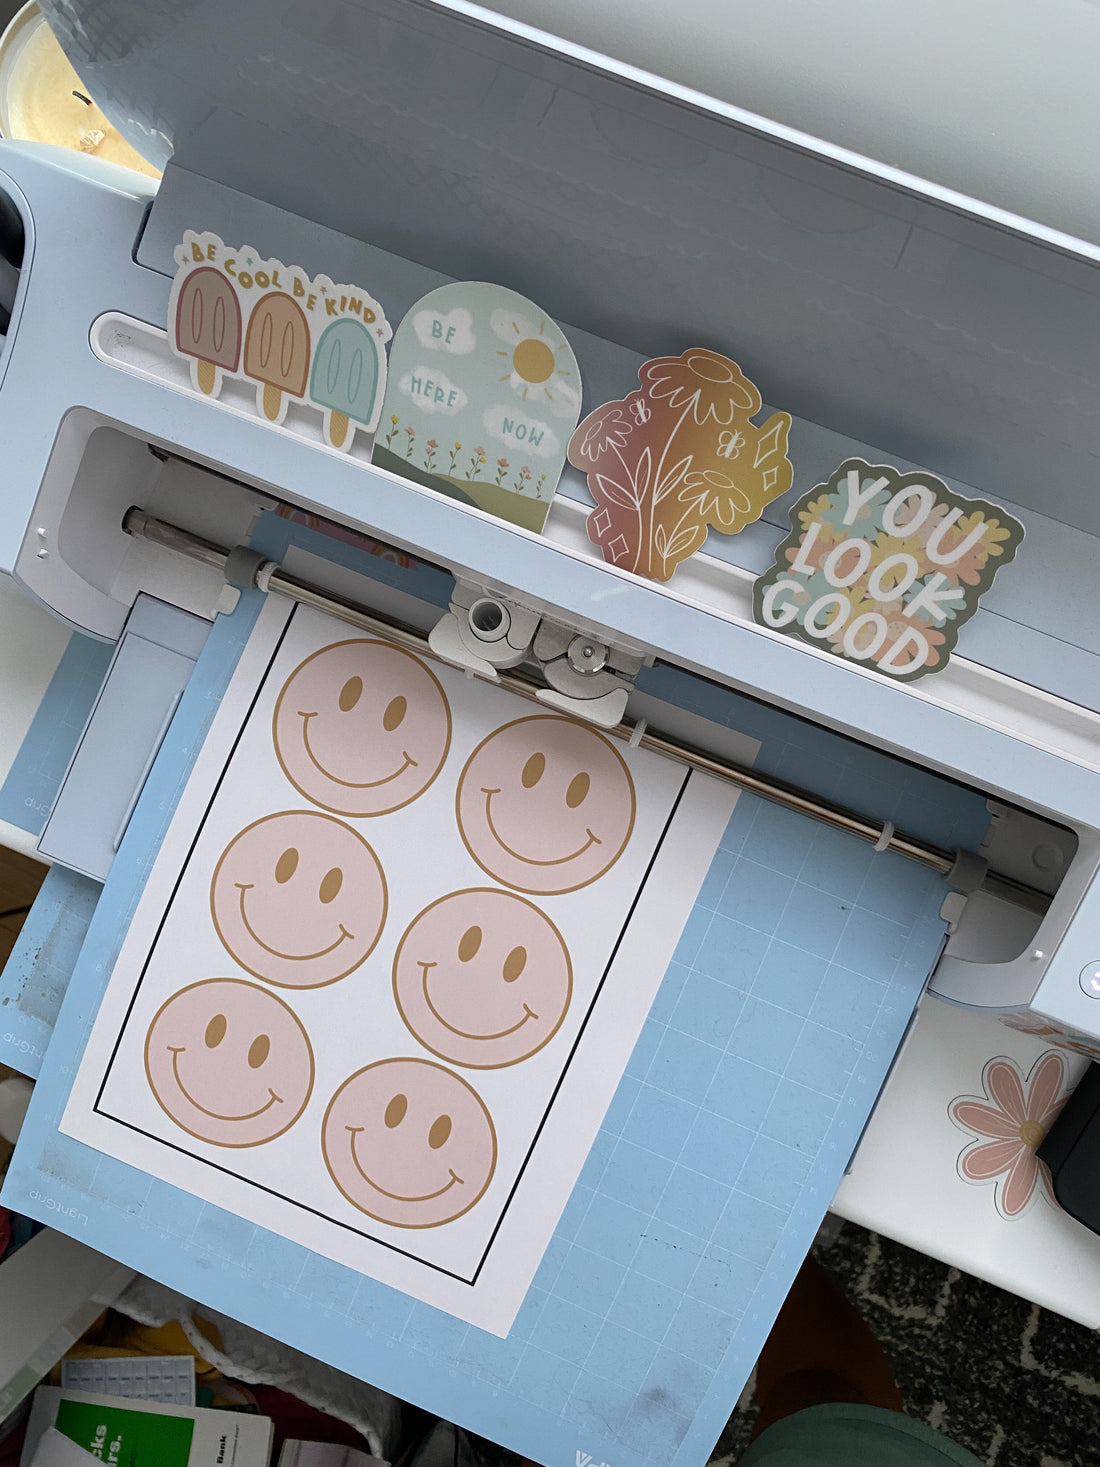
Once your sticker paper finishes printing, take it out of the printer. Back over on your Cricut Design Space software, select "Base Material" to "Printable Sticker Paper." Place your sticker printed sheet on your Cricut Cutting Mat.
Put the mat in your Cricut Machine and let it cut all your stickers out!

When it's done, you'll take the mat out of the machine and remove the excess paper off the cutting mat. This will reveal the beautiful stickers. Then, you will carefully peel the stickers AWAY from the cutting mat.
Pro Tip: Turn your mat upside down so you can peel the stickers down and away from the mat, instead of aggressively pulling the sticker up. We don’t want crinkled or curly stickers, right?


And there you have it - your very own handmade stickers!

YOUR TURN TO TRY!
Ready to try on your own? You got this! If you don't have tools to design a sticker yet, or you need a little inspirational push to get started - I GOT YOU! I'm gifting you a “Bloom Your Own Way” free sticker PNG file that you can download to experiment and try making some stickers with this tutorial. It has a transparent background and it's ready to be printed and cut. Yay!


Limits of use: Please be aware this sticker file is for personal use only - it is NOT intended for commercial use. This design cannot be resold digitally, altered to sell, or made into any physical product in any form to be sold. Rights remain with Created By Christine.
CLICK HERE TO ACCESS YOUR FREE STICKER DESIGN FILE!
Best of luck and have fun.
MORE RESOURCES FOR YOU
If you're looking for more sticker making supplies or sticker shop/small business finds, I have lots of items linked in my Amazon storefront - check it out!
LET’S BE FRIENDS
Be sure to follow me on Instagram and TikTok @createdbychristine for more sticker tips, small business finds, and following along my own small biz journey!
Trust your creativity and keep smiling,
Christine
2 comments
I use AI to make custom sticker designs that I sell on Etsy:
https://www.mockofun.com/ai-sticker-generator/
This is a great tutorial! Brb going to try making stickers now